Managing DNS Records with cPanel's Zone Editor
Managing DNS records is essential for ensuring that your domain name points to the correct server and services. This guide will walk you through the steps to manage your DNS records using cPanel's Zone Editor.
- Access the Zone Editor
1.1. Open your web browser and log in to your cPanel account.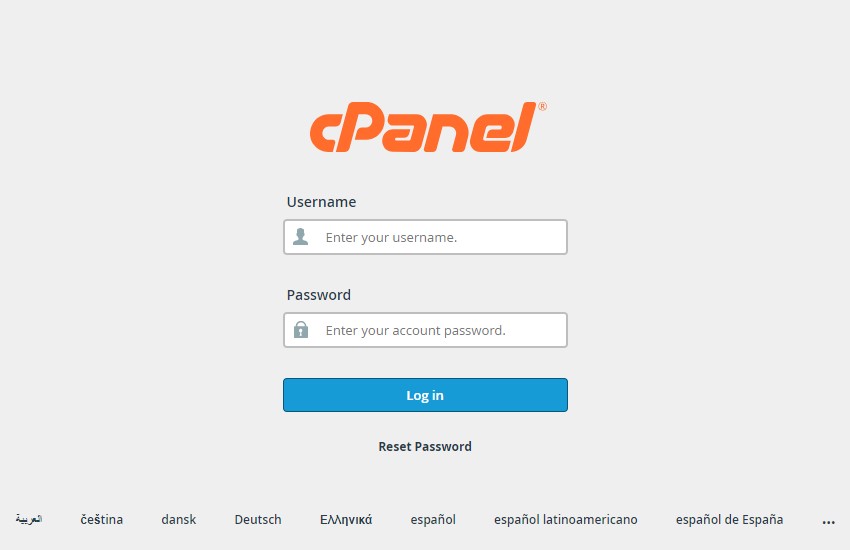
1.2. On the cPanel home screen, scroll down to the "Domains" section and click on "Zone Editor".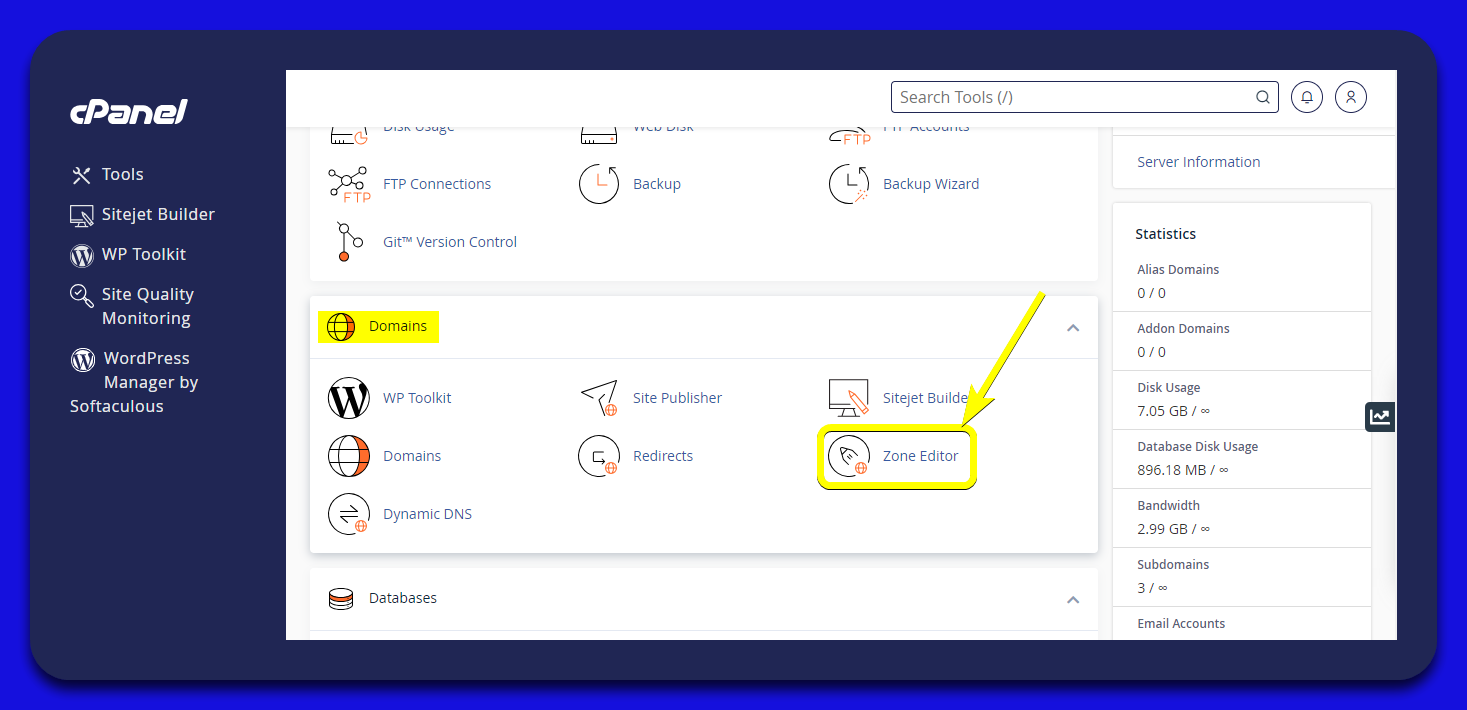
- Select the Domain to Manage
2.1. In the Zone Editor interface, you will see a list of your domains.
2.2. Click on the "Manage" button next to the domain you wish to edit.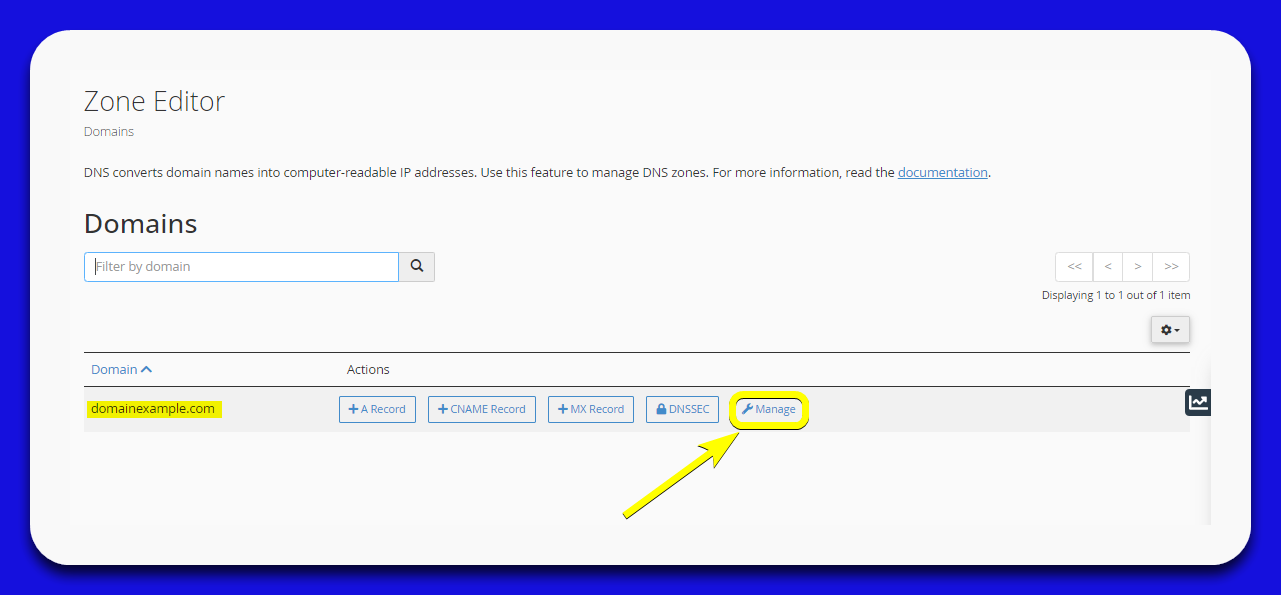
- Add or Edit DNS Records
3.1. To add a new DNS record, click on the "+ Add Record" button.
Enter the record details:
- Name: Enter the name for the DNS record (e.g., domainexample.com.).
- Type: Select the type of DNS record you want to create (e.g., A, MX).
- Record: Enter the value for the DNS record (e.g., 192.168.1.1 for an A record).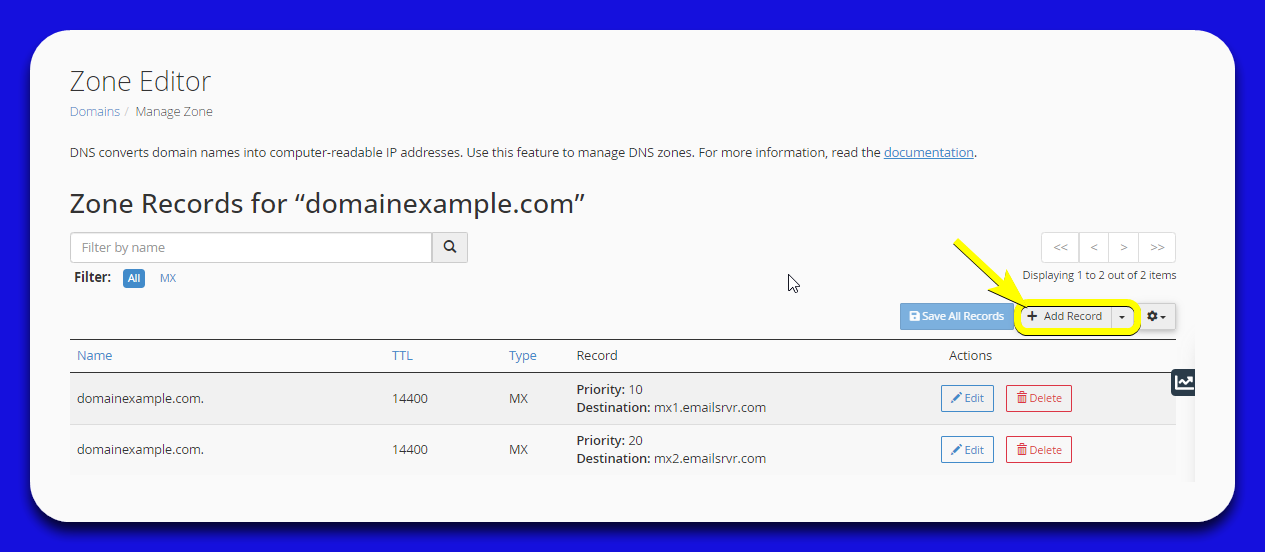
3.2. Click the "Save Record" button to save the changes.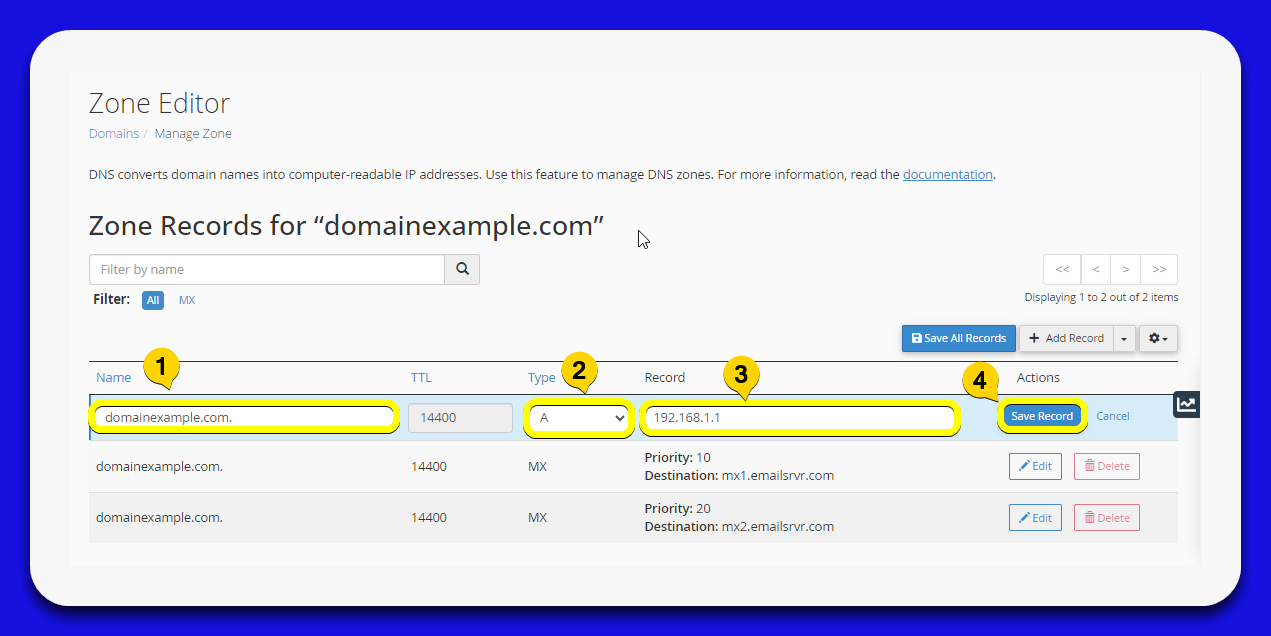
Important Notes
You can repeat these steps to make further changes as needed.
For any issues or further assistance, please contact our support team.

