- Go to the Databases section:
1.1. In the cPanel control panel, look for the section titled "Databases".
1.2. Click on "Manage My Databases" to manage your databases.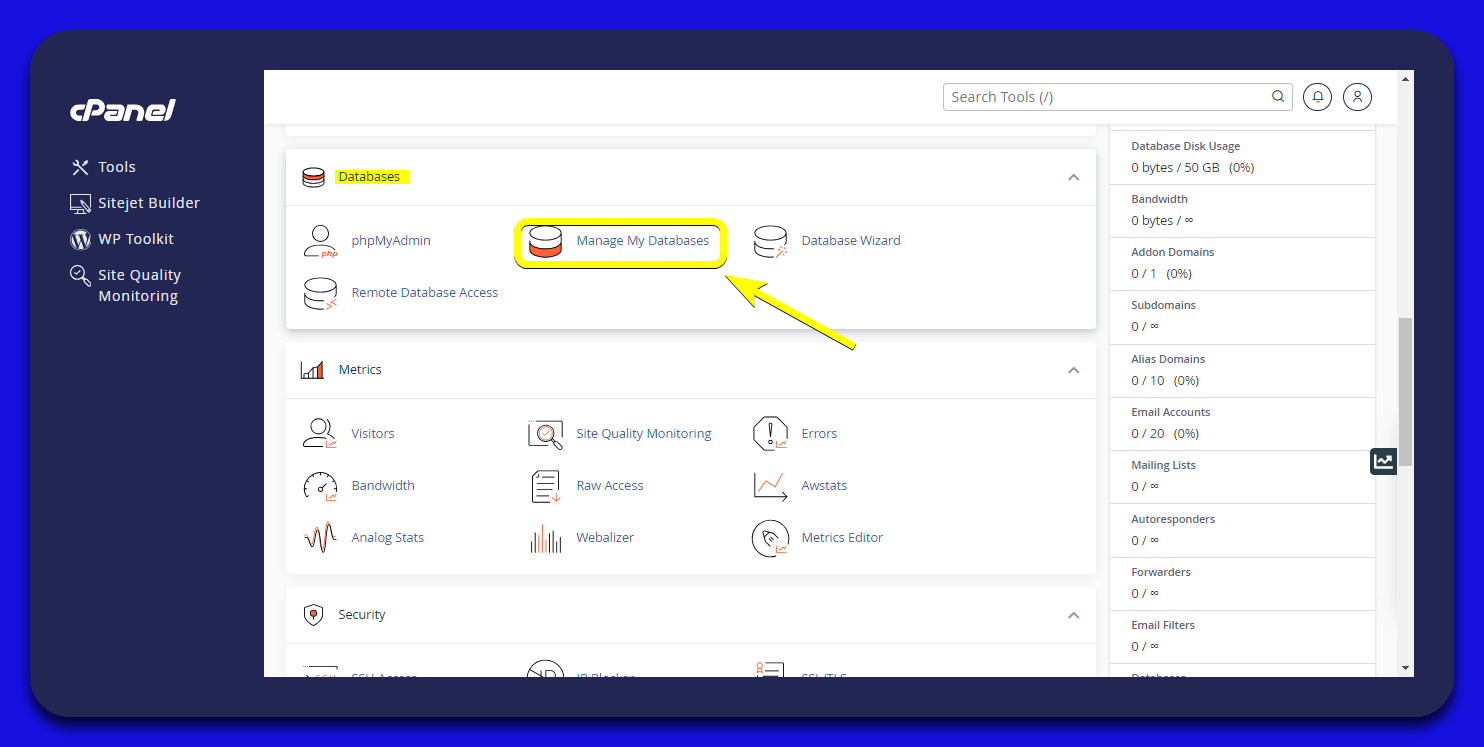
- Create a New Database
2.1. Enter the database name: Under "Create New Database", type the name you want for your database.
For example, the prefix is wegeex_ and the name is "test".
2.2. Click on "Create Database": After entering the name, press the "Create Database" button to create the new database.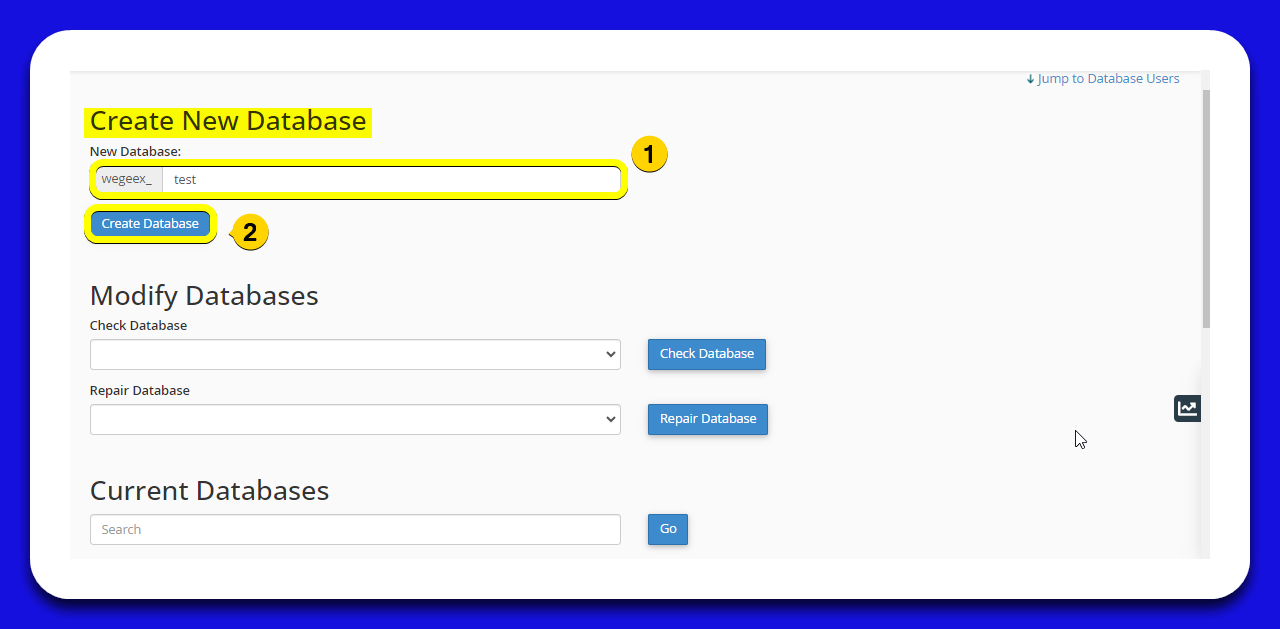
- Create a New Database User
3.1. Enter the username: In the "Username" field, type the name of the new database user.
For example, the prefix is wegeex_ and the user is testuser.
3.2. Enter the password: In the "Password" field, enter a secure password for the user.
3.3. Confirm the password: Re-enter the password in the "Password (Again)" field to confirm.
3.4. Click on "Create User": After completing the fields, Click on "Create User" button to create the new database user.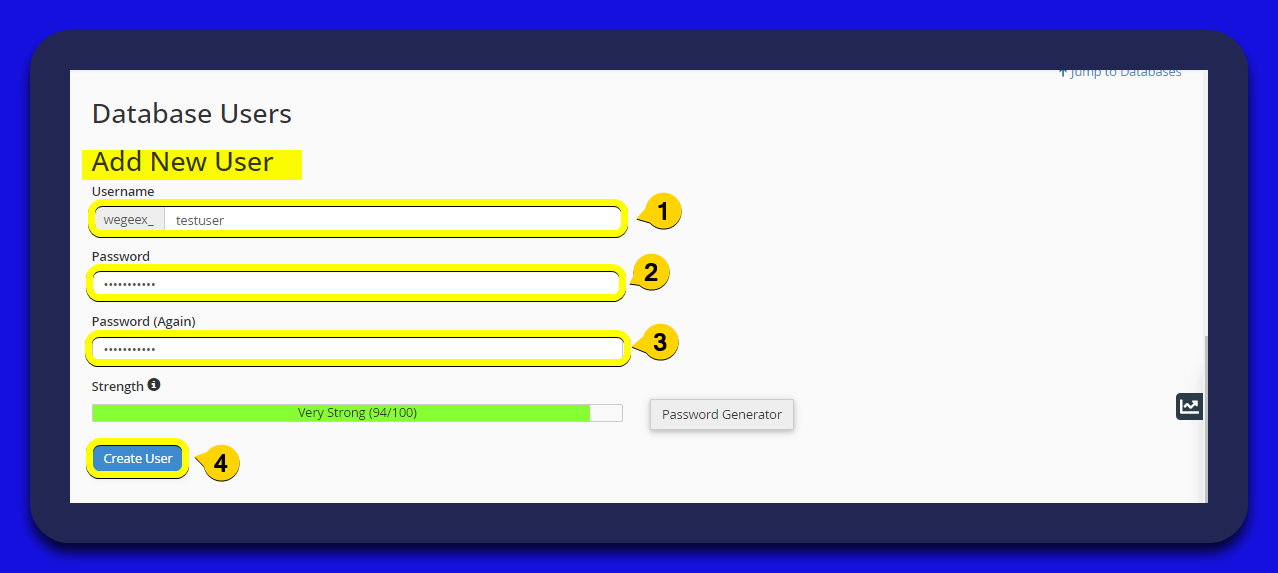
- Assign the User to the Database
4.1. Select the user: In the dropdown menu under "User", choose the user you just created (e.g., wegeex_testuser).
4.2. Select the database: In the dropdown menu under "Database", select the database to which you want to assign the user (e.g., wegeex_test).
4.3. Click on "Add": Press the "Add" button to assign the user to the database.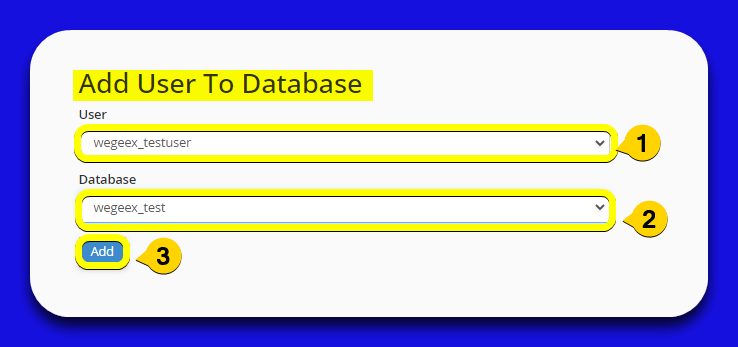
- Assign Privileges to the User
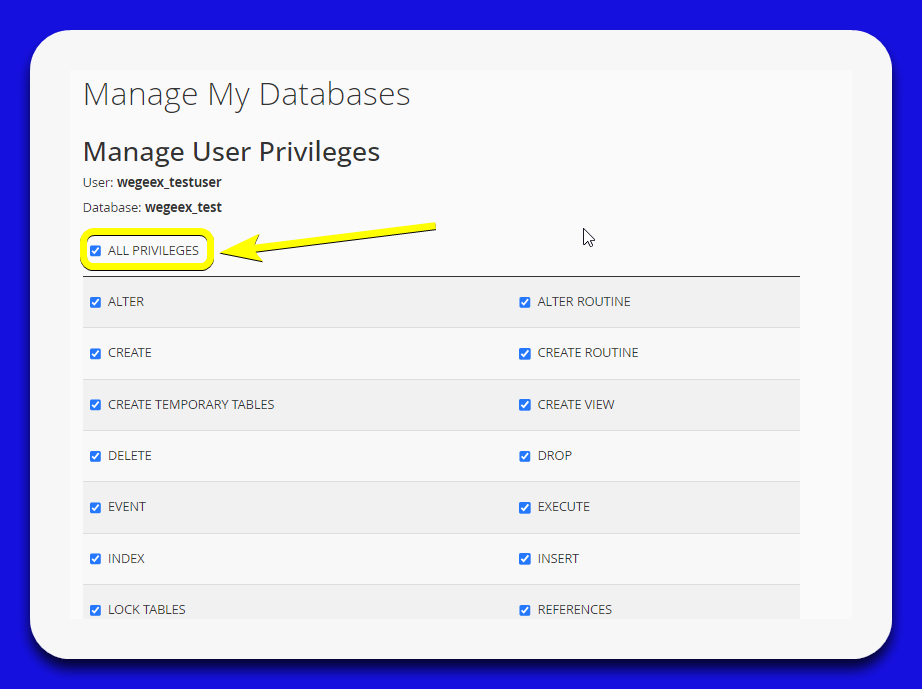
5.1. Select "All Privileges": Check the "All Privileges" box to grant all privileges to the user over the selected database.
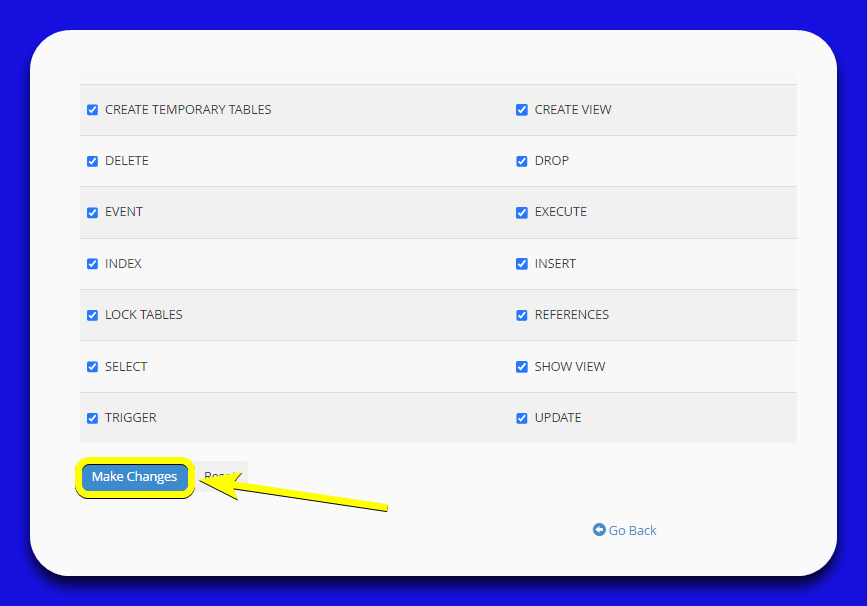
5.2. Click on "Make Changes": Finally, press the "Make Changes" button to apply the changes and assign privileges to the user.
5.3. Review the privileges: Ensure all necessary privileges are selected for the user over the database.
5.4. Save changes: Click on "Make Changes" if you haven't already done so, to confirm and save the changes made.