If your emails will be managed by an external email provider such as Google Workspace, Microsoft 365, Rackspace, Zoho Mail, among others, you must first complete the email configuration from the DNS Zone Manager in cPanel.
Before You Begin
Contact Your External Email Provider: Get in touch with the technical support team of your external email provider and request the MX records for your email service.
Steps to Follow Once You Have the MX Records:
- Log In to Your cPanel Account
1.1. Access cPanel: Log in to your cPanel account using your credentials.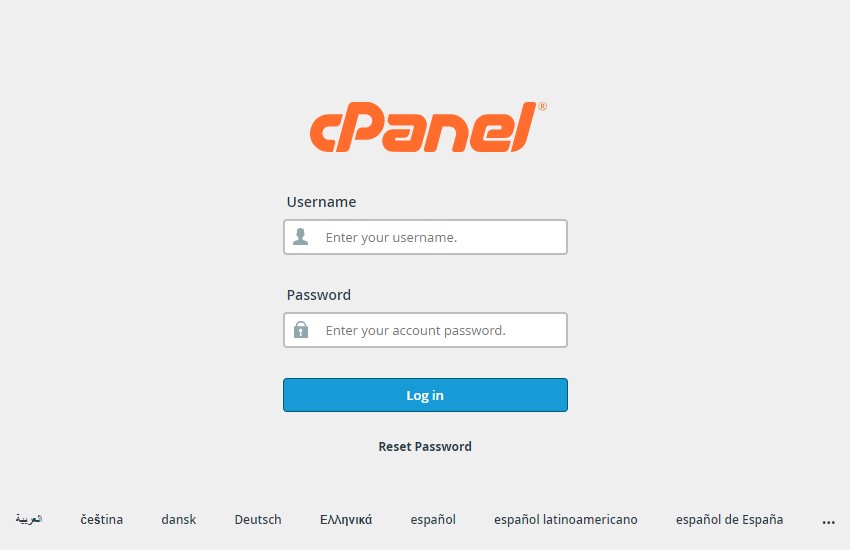
- Access the Zone Editor
2.1. Navigate to Domains Section: Go to the “Domains” section and click on the “Zone Editor” option.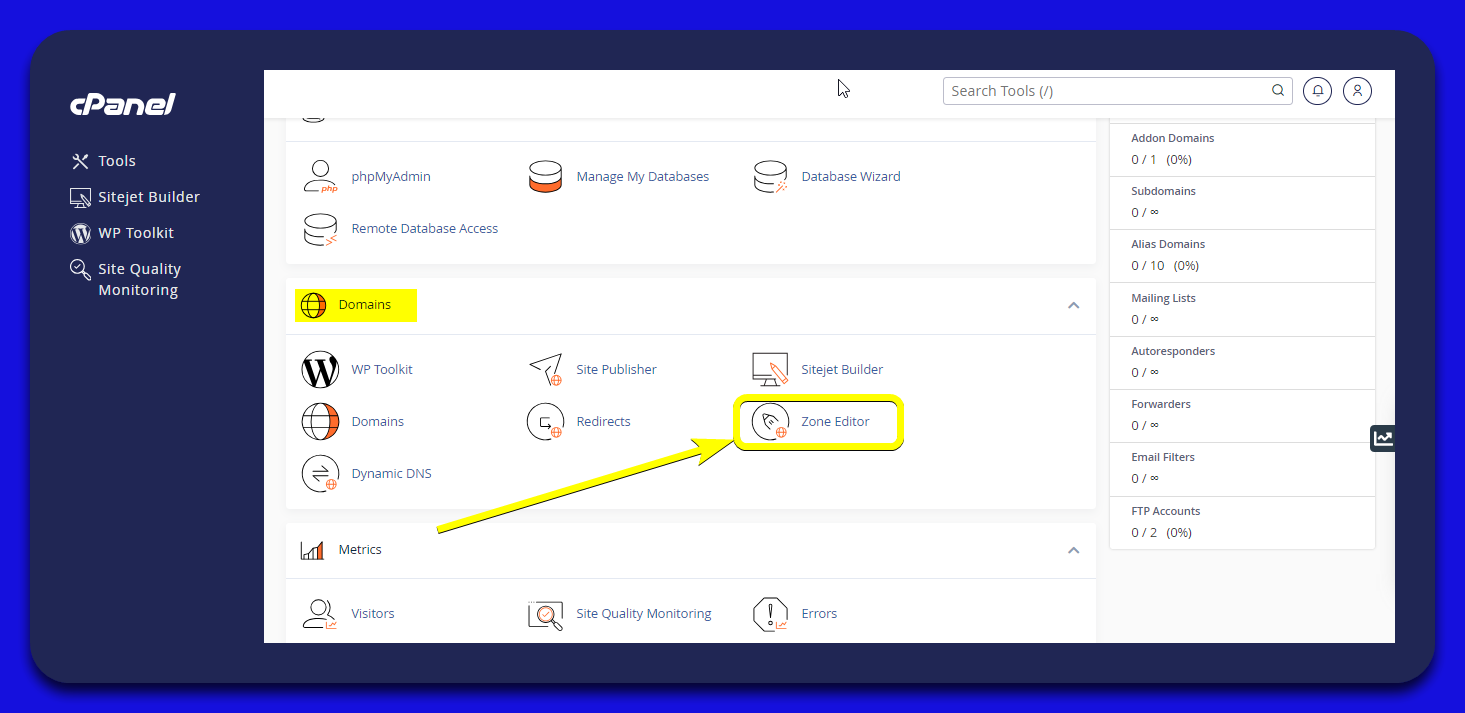
- Manage Your Domain's MX Records
3.1. Select Your Domain: Find the domain to which you want to add the new MX record and click on the “Manage” button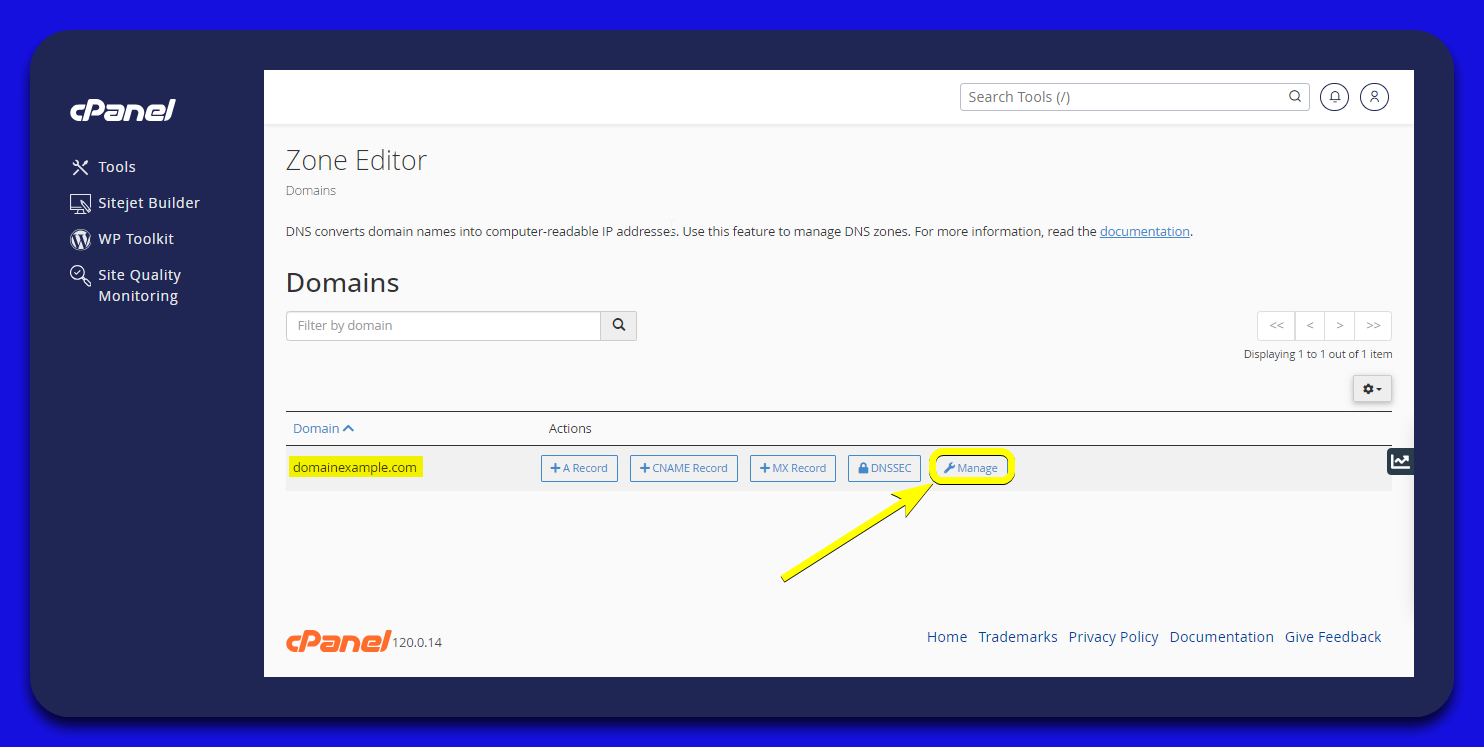
3.2. Identify and Delete Existing MX Record: Locate the current MX record associated with your email service on cPanel with Wegeex. You can identify it by the “Destination” section showing mail.yourdomain.com. Click on the “Delete” button to remove this record.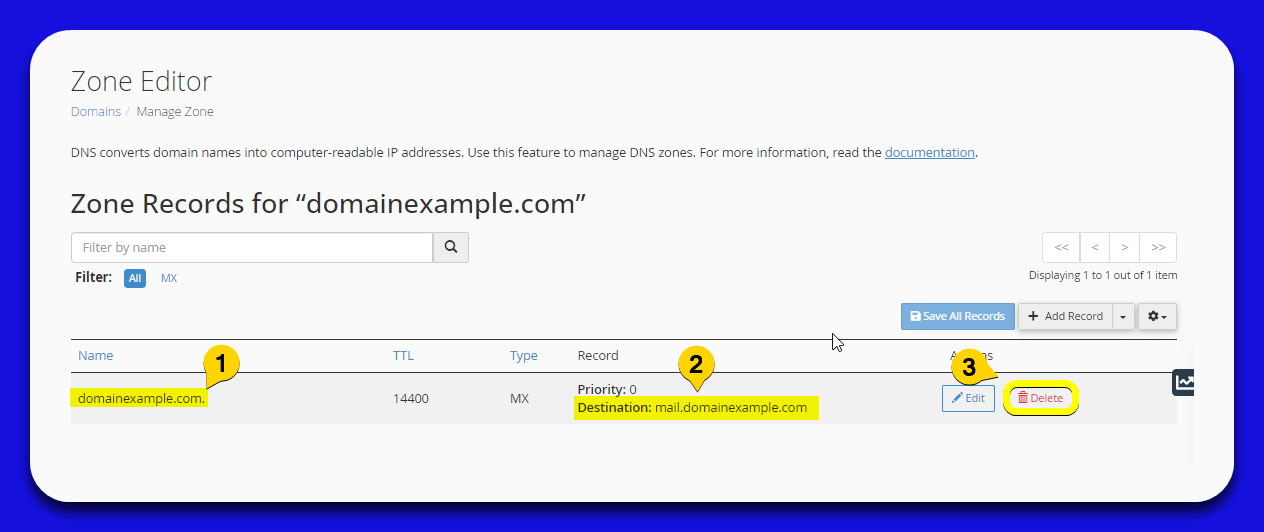
- Add the New MX Record
4.1. Add New Record: Click on the “Add record” button.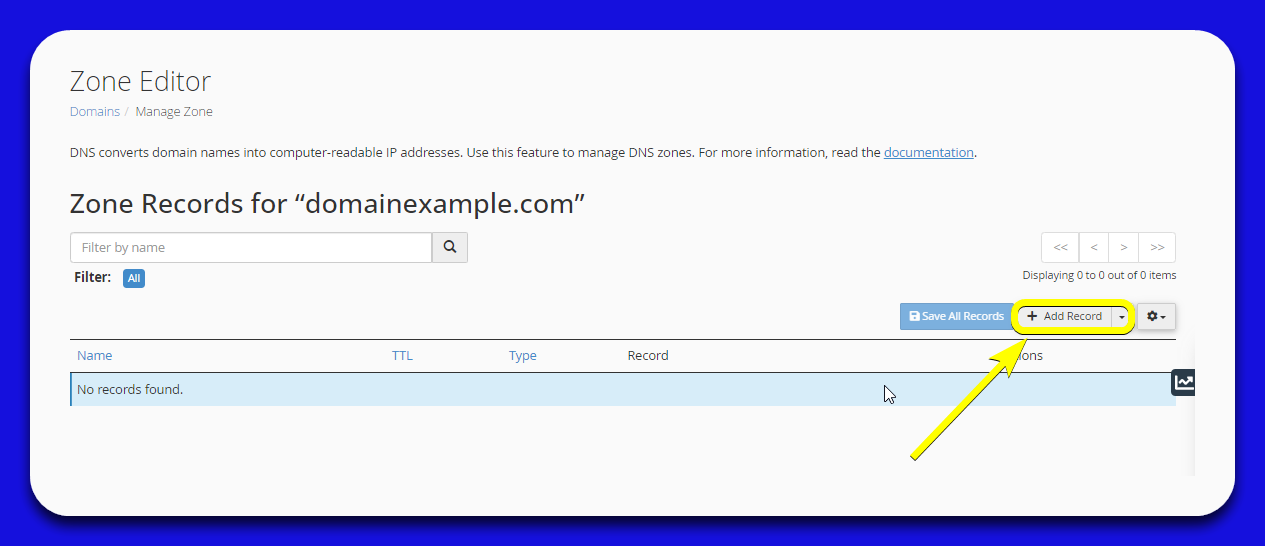
4.2. Enter Details: In the “Name” field, enter your domain name. In the “Type” field, select “MX”.
Enter the "Priority" and "Destination" information provided by your email provider.
Name Type Priority Destination yourdomain.com MX Enter your provider's configuration. Enter your provider's configuration.
4.3. Save Record: Click on the “Save record” button.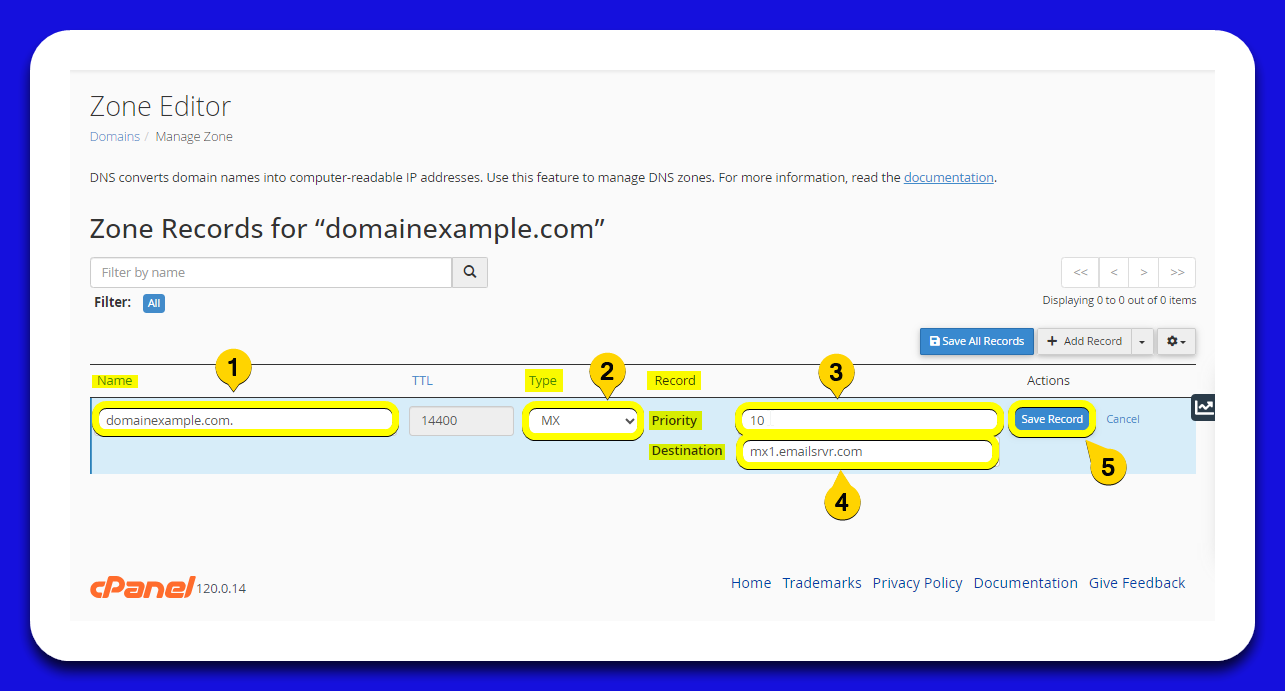
- Configure Email Routing
5.1. Navigate to Email Section: Go to the main menu of cPanel and find the “Email” section.
5.2. Select Email Routing: Click on the “Email Routing” option.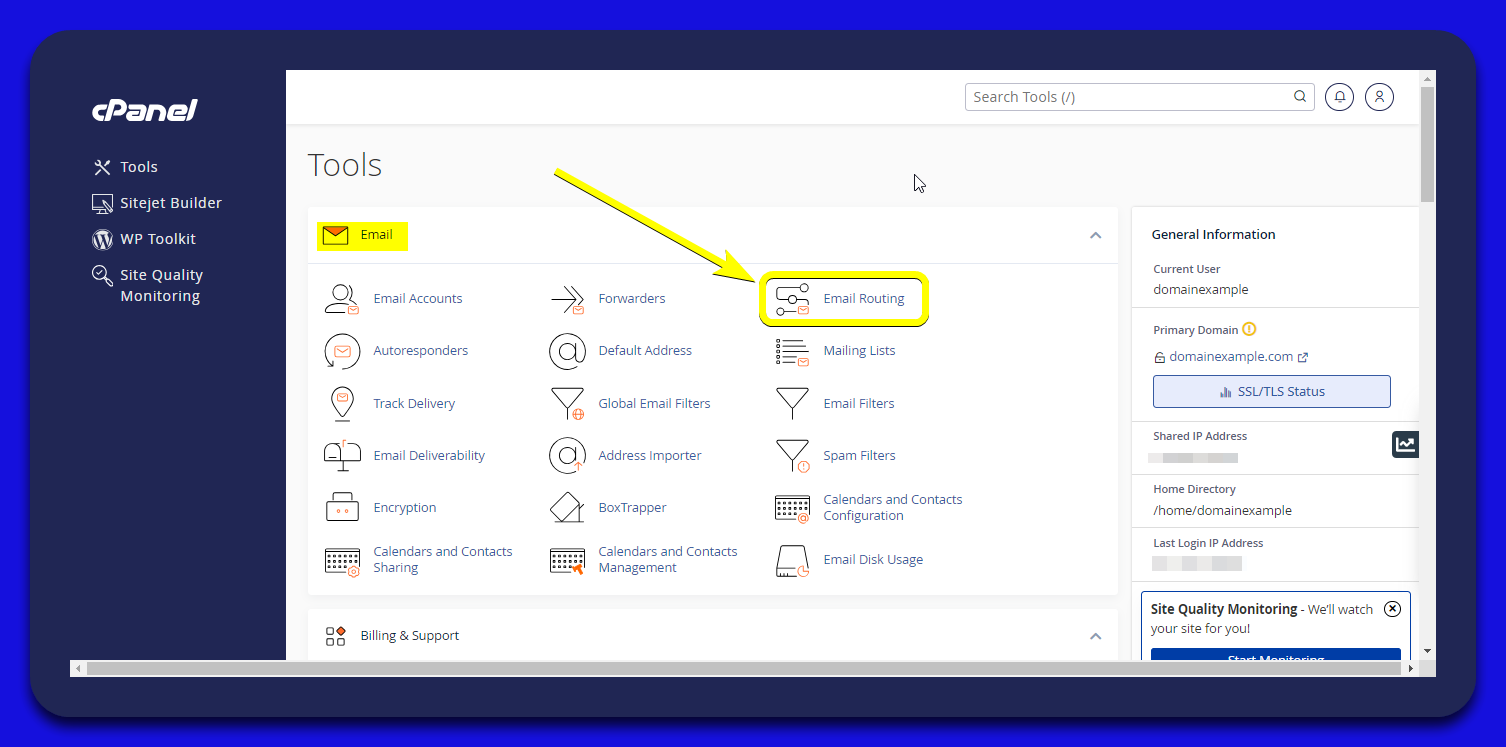
5.3. Choose Remote Mail Exchanger: Select the “Remote Mail Exchanger” option and click on the “Change” button to finalize the configuration.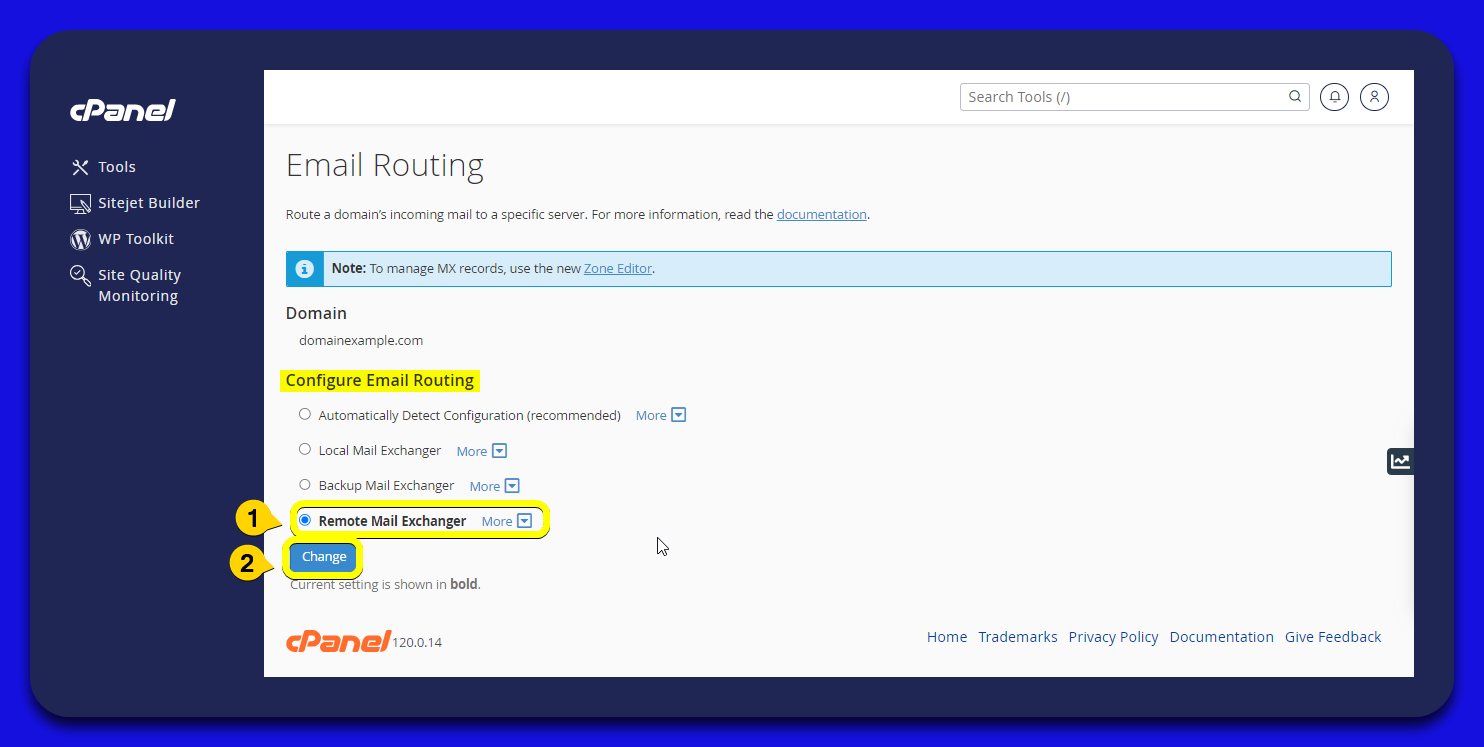
Important Note:
After completing all the steps in this guide, you need to wait for DNS propagation, which can take anywhere from a few minutes to 24 to 48 hours to complete.

